Setting up CMMT using Point to Point, EtherCAT version, using CODESYS Soft PLC
By John Narup, Application Engineer, Festo USA
(First set-up your axis in Festo Automation Suite (FAS) before you begin your CODESYS project.)
Using CODESYS V3.5 SP15 Patch 4
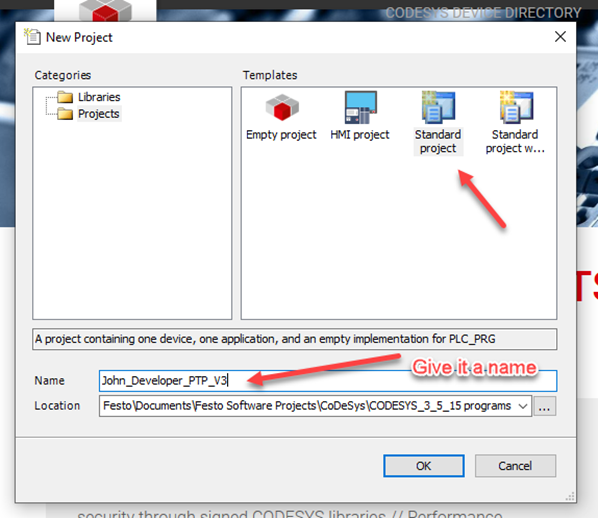
- Start by Creating a New Project
- Choose Standard Project
- Give the project a Name and Location to be saved

You will then get a pop-up to choose the Device and PLC_PRG in
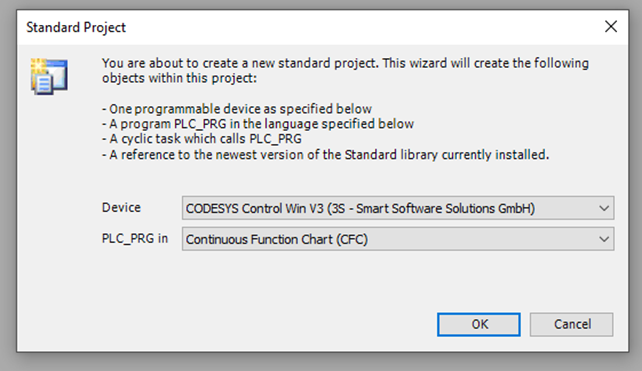
- For Device choose CODESYS Control Win V3 – this is the Soft PLC
- For PLC_PRG in – choose Continuous Function Chart (CFC)
- Click OK
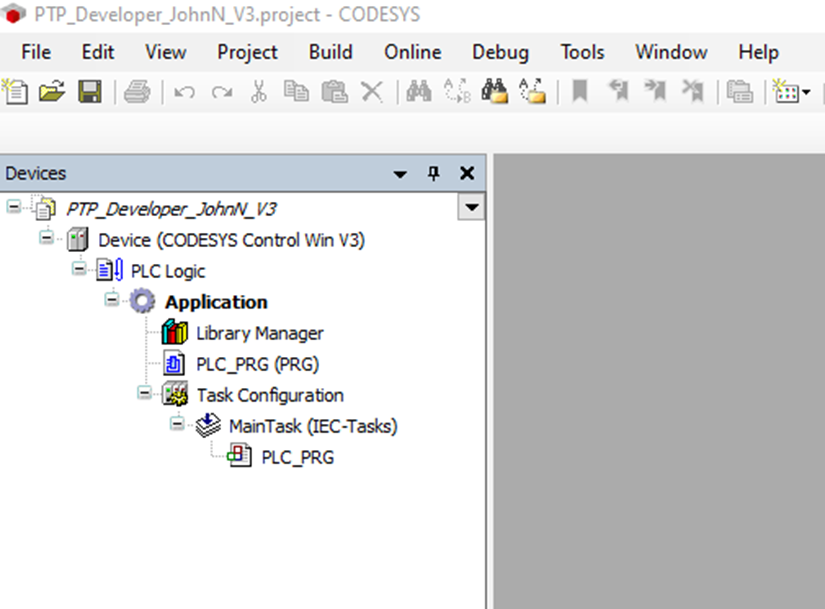
Your Device Tree, on the left, should now look like this:
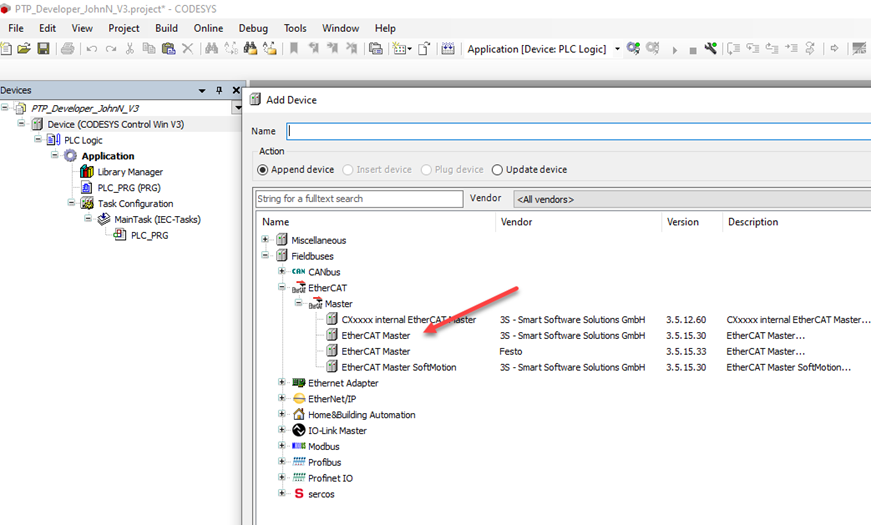
Now right click on Device and go down to Add Device
We need to add an EtherCAT Master
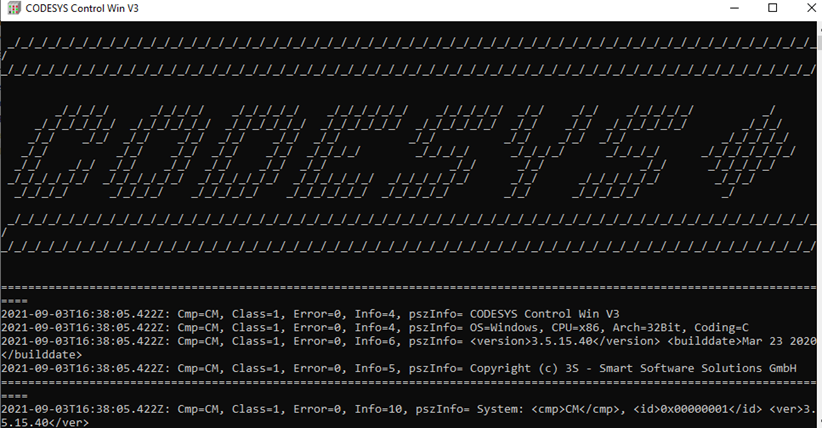
At this point let's start the Soft PLC
Click the Windows symbol in the lower left corner of the screen (Start Menu)

Then type in CODESYS Control Win V3 this is the program to start the Soft PLC
You will get a window that looks like the one below and an icon will appear in the taskbar
If you get a line in this window that states Network Adapter could not be opened, there are two items to check.
First you should get a Windows Security Alert
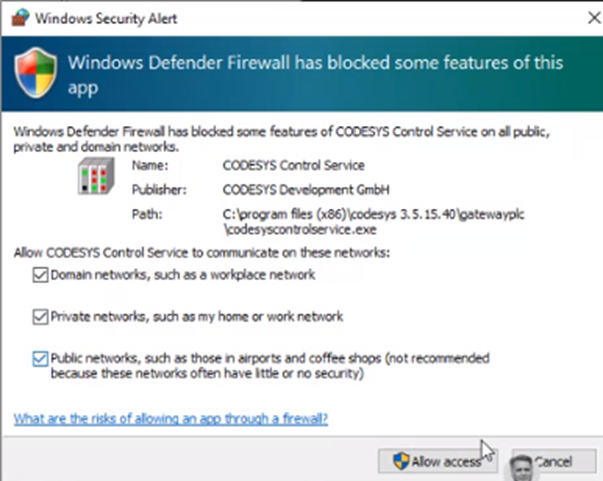
Make sure all three boxes are checked to allow access
Second and you should get a message for this also, make sure WinPcap is installed
If not, It can be downloaded from www.winpcap.com
At this point the Soft PLC should be able to access the network adapter
Now let's set-up the EtherCAT Master, to open its window double click the master
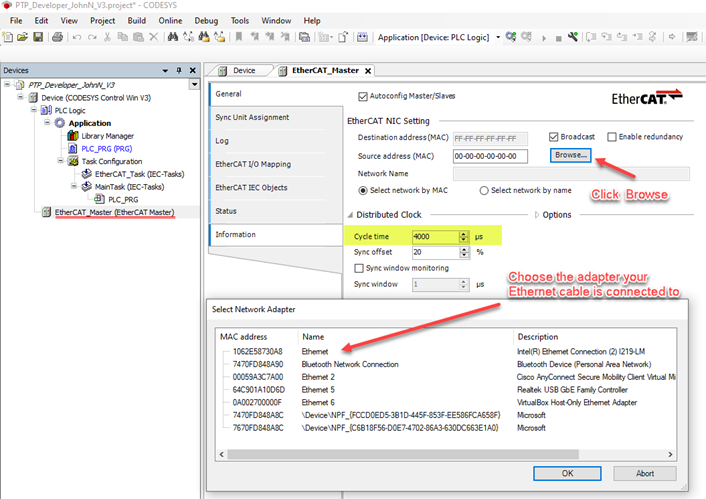
Let’s first choose the correct NIC setting, click the Browse box.
My ethernet cable is connected from my laptop to the EtherCAT In-Port so I need the top choice, the Intel(R) Ethernet Connection
Also, on this page change the Distributed Clock’s cycle time to 16000 micro sec; 4000 microseconds are too fast for the Soft PLC
Now we need to add the CMMT-ST slave.
Right click on the EtherCAT Master and go down to Add Device
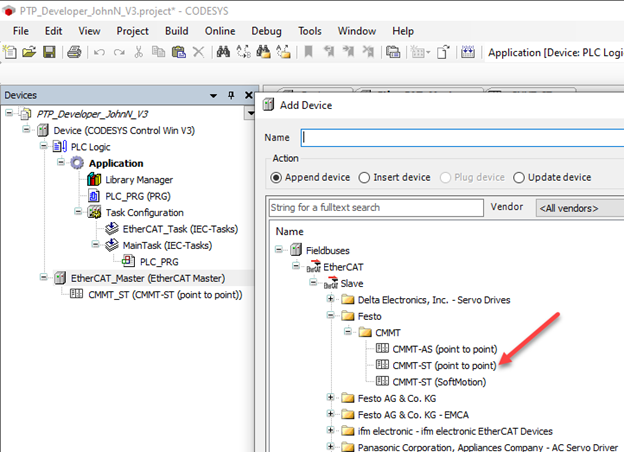
We need to choose the CMMT-ST (Point to Point)
Shown in the above screenshot I have installed two other packages for the CMMT
If you do not have any CMMT’s shown, you need to install the Package from the web.
The next step is to set-up the communications path “Gateway and Device”.
Double click the Device (CODESYS Control Win V3)
In the Communications Setting tab you want to Scan Network
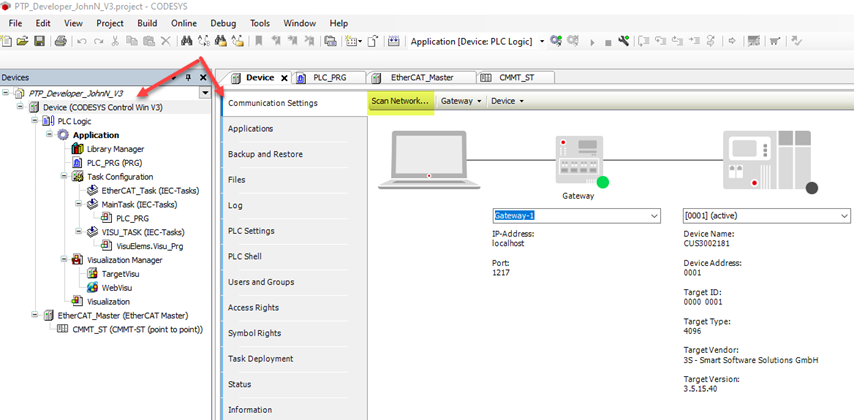
You should get a pop-up window that has your PC shown under the Gateway-1
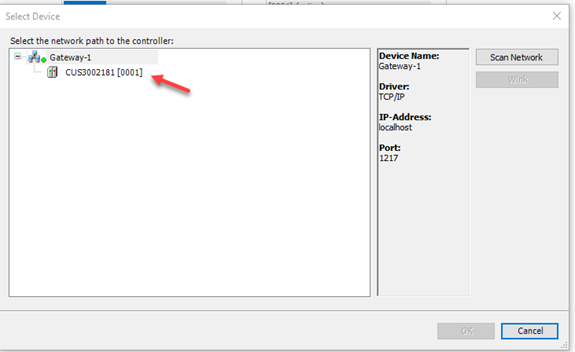
Then pick your PC name, in my case it is CUS3002181, and then click the OK at the bottom right of the window.
Both the Gateway and the Device should have green dots next to them.
Now with the PLC running, both the Master and Slave added and the communications path set it is time to Login and Run
Go to Online at the top of the screen and choose Login
Then go into the Run mode, Top of the screen click Debug and choose Start
Your screen should look like this with green dots and green circles.
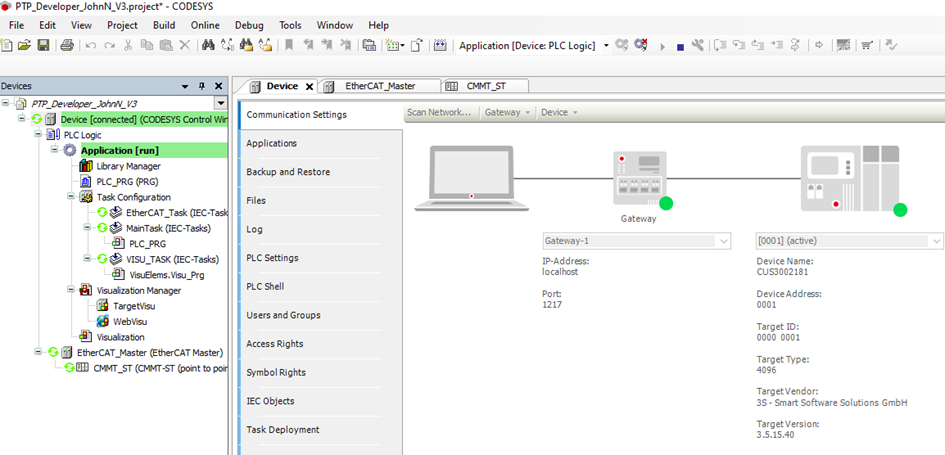
If a message to rescan the network occurs go to the Device and click Scan Network
You should get all the green circles as shown above.
At this point you can go back off-line and do some programming in the PLC_PRG and add a visualization to control the axis.
First double click the PLC_PRG
Then grab a Box from the CFC ToolBox and drop it into the programming field
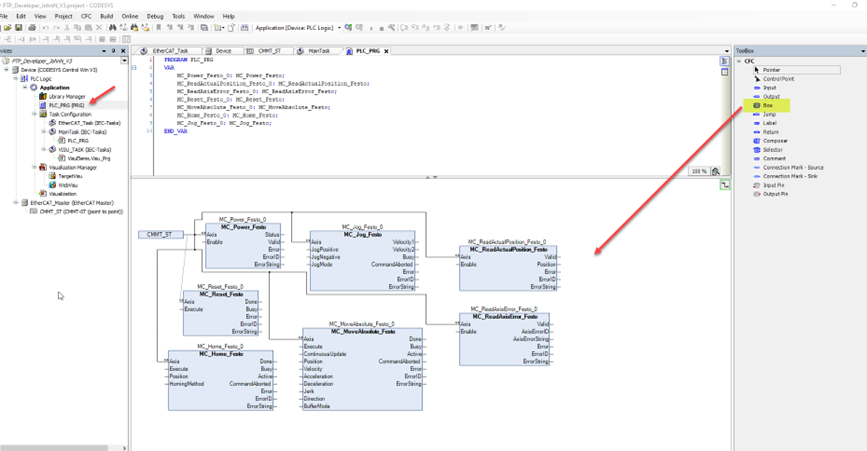
To add a function to the Box, double click on the ??? and you will get a square
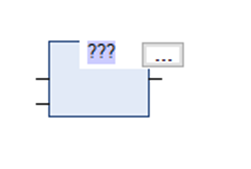
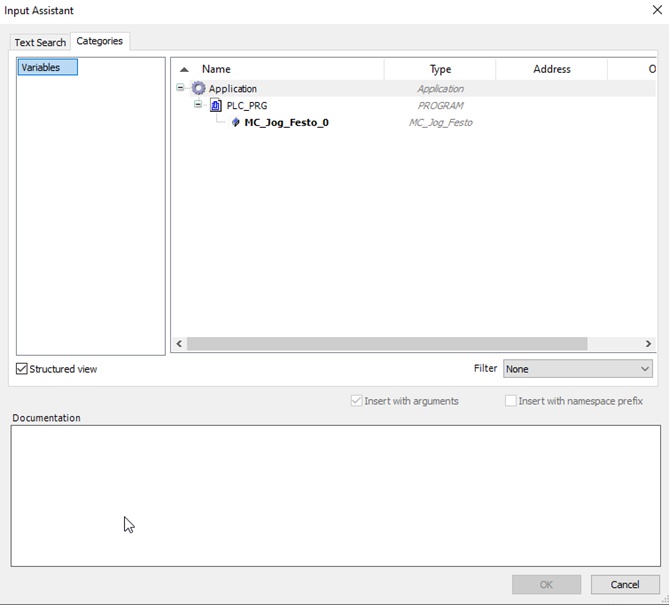
Click on the square with the (…) and you will get the Input Assistant
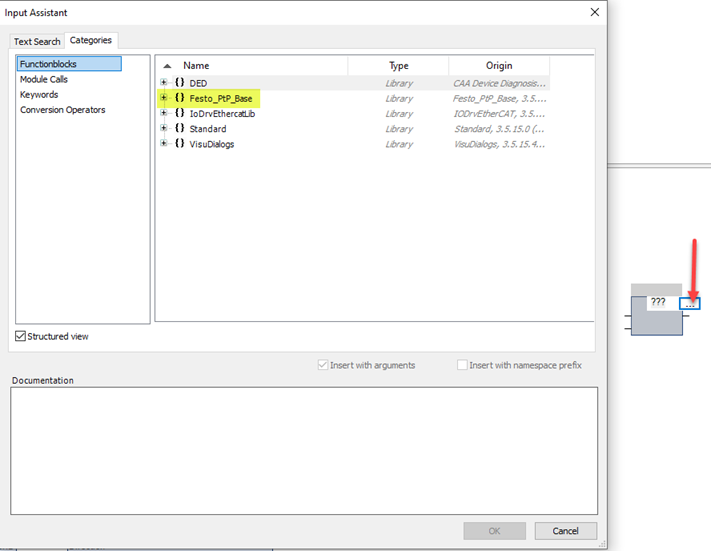
Open up the Festo_PtP_Base and find selections like
MC_Power_Festo
MC_Reset_Festo
MC_Home_Festo
MC_Jog_Festo
And others
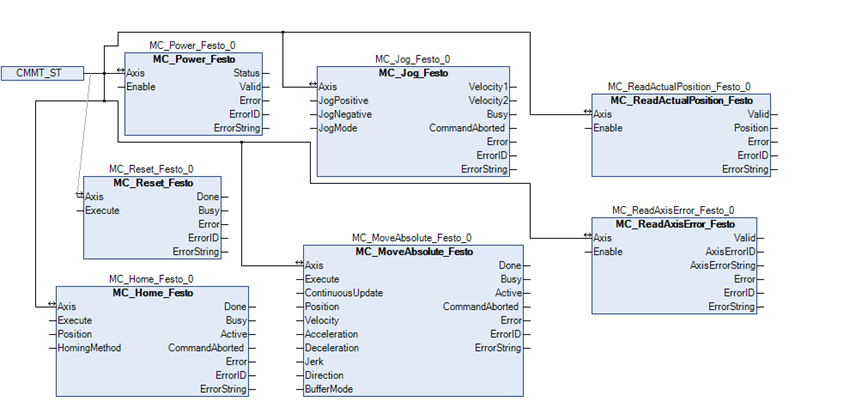
Once you have your desired boxes you have to tie them to the axis you need to control. Grab an Input from the ToolBox, just like we did before with the box. Then double click on the ??? to get the box with the (…), click the box to get the Input Assistant. Then In the IoConfig_Globals find you slave axis.
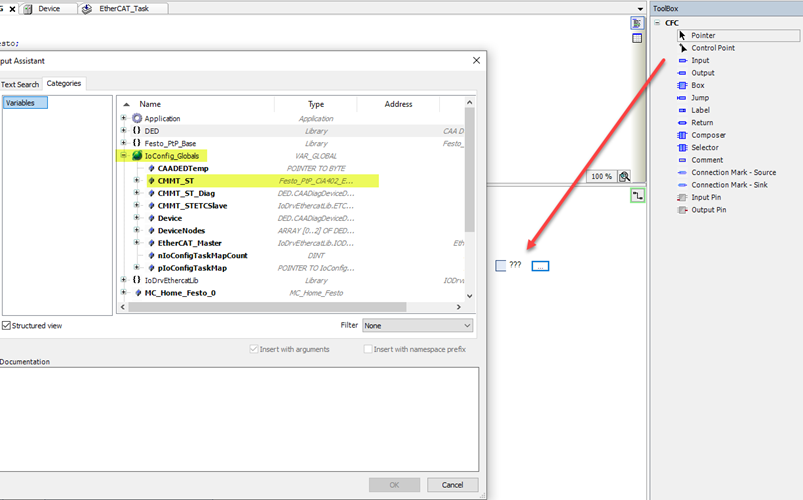
For this example, the Axis name is CMMT_ST, Double click on it and the input will fill-in. The final step is to tie the input to the Axis of each box you brought in. See below:
Now that we have something in the PLC_PRG we can add a visualization.
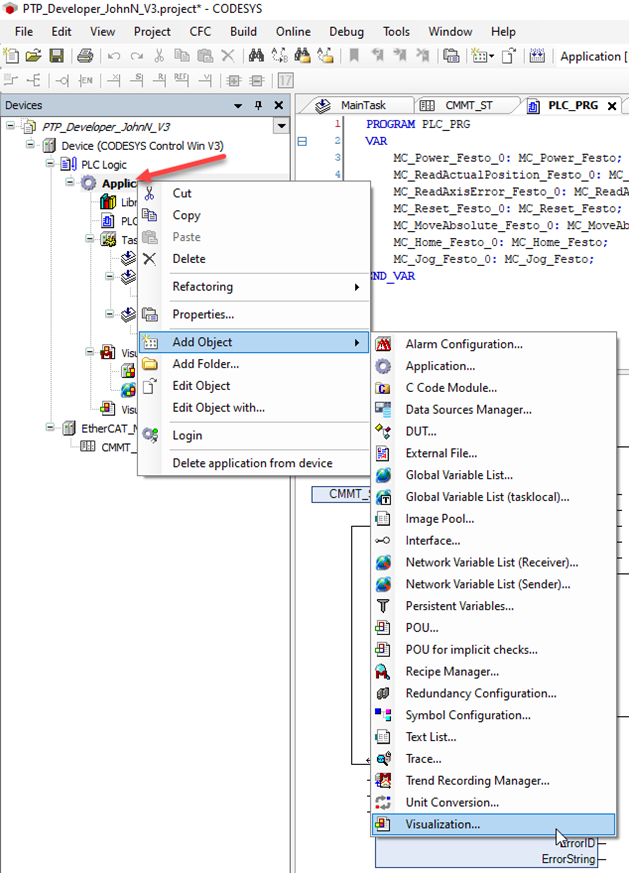
Right click on Application and go to Add Object then choose Visualization…
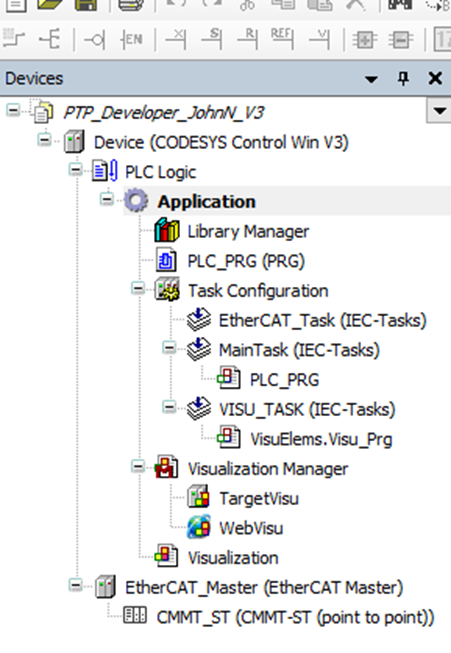
Your Device tree on the upper left should now look like this:
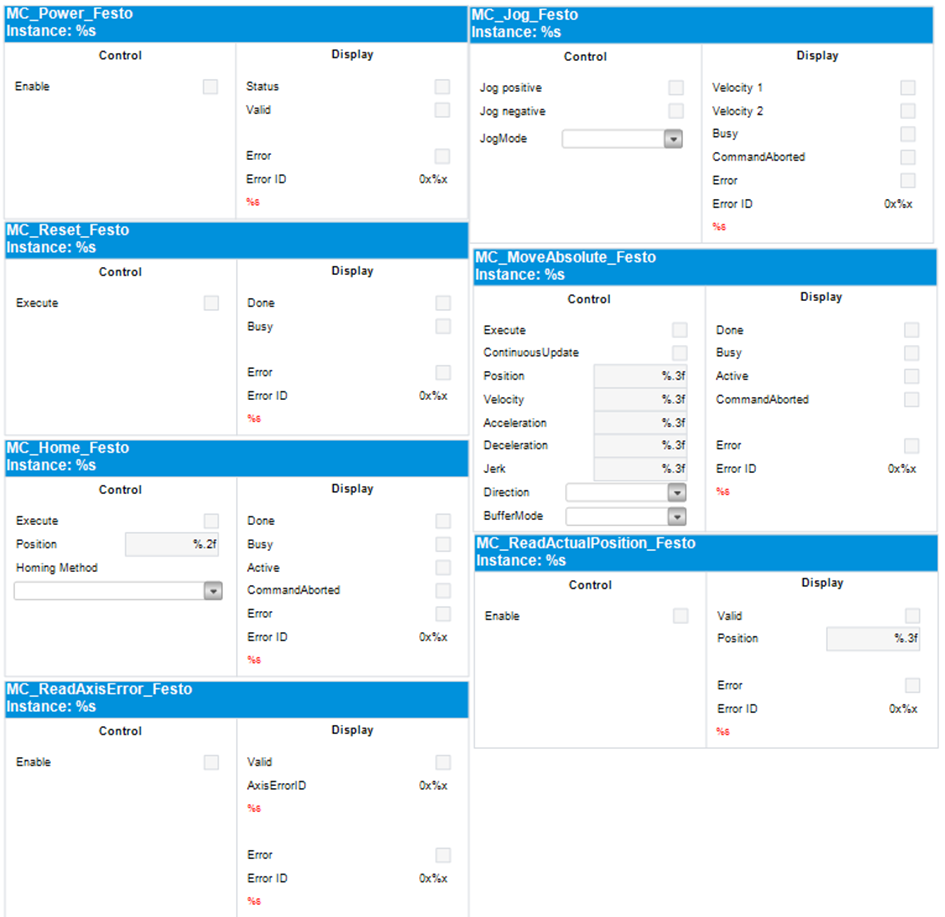
Double click on the Visualization to open it up. In the middle is the area you can add pre-made visualizations from the ToolBox on the right side. In the ToolBox you should see a tab called Festo_PtP_Basic, click that tab find the Instances.
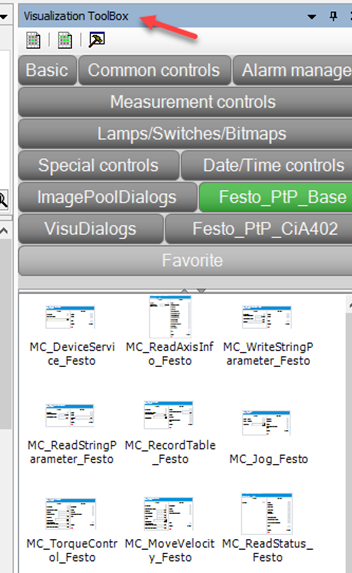
Drag and drop the instances that match the Boxes you created in the PLC_PRG
Now you have to assign the parameters to the Visualization
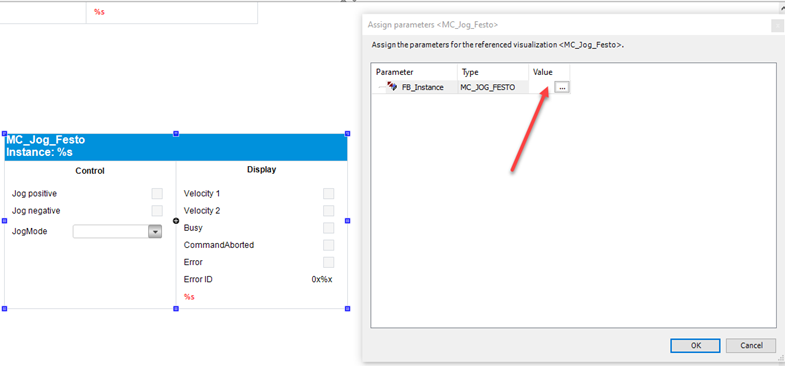
When you drop the Visualization you will get the Assign parameters pop-up, double click the Value field to get the (…) and click that box, the same as we did before to get the Input Assistant.
Then open up the Application and the PLC_PRG to get to the function. Click it and hit OK to assign. Do this for each box in the PLC_PRG so you can control the axis via the Visualizations. Below is an example of some boxes you could use.
Now you can go back on-line / login and start the program in Debug / Start. Make sure you Soft PLC is running.
Disclaimer: This post is provided solely for the purpose of offering setup assistance and general guidance. It is important to note that the ultimate responsibility for ensuring the overall safety and proper functionality of the machine lies with the System Integrator / End User. It is crucial to exercise caution, adhere to proper safety protocols, and consult relevant experts or professionals when necessary.
Although Festo employees will be contributing to this blog, please note this is not the official Festo support channel. For more timely technical support please reach out to your regional Festo support channel and/or consult user manuals and relevant documentation in www.festo.com